Google Forms - Modifying an Image Inserted Into Form
In yesterday's post, we saw it is very easy to add images into your form. Once an image is added, though, you might want to modify it, or even change the image. Today's post will focus on the variety of ways you can modify your image after it has been inserted into your form.
Here is a link to yesterday's post on inserting the image. Tomorrow's will demonstrate how to add images to your questions. If you prefer a short video, here is one that shows How to Modify an Image in Your Form.
To modify an inserted image:
Click on the question containing the image. Once you are in edit mode on the question, there are several items at the top:
When you click on the More options menu, you have a few more options:
If you click on Change, it will bring back up the Insert image screen that you used in initially choosing your picture -
Finally, there is another More options menu on the right side of the trash can icon at the top -
There is an option to add Hover text to the image -
When you select this, it adds another line for text -
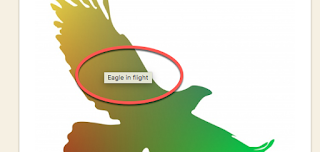
The text you put here will pop-up when the user hovers over the picture -
Here is a link to yesterday's post on inserting the image. Tomorrow's will demonstrate how to add images to your questions. If you prefer a short video, here is one that shows How to Modify an Image in Your Form.
To modify an inserted image:
Click on the question containing the image. Once you are in edit mode on the question, there are several items at the top:
- Area for the image title
- More options menu (3 stacked dots)
- Icons for duplicating and trashing the image similar to other questions
When you click on the More options menu, you have a few more options:
- Set the alignment for the image within your form
- You can change the image if you want a different one (more on this below)
- You can also Remove the image from here (this does the same as using the trash icon)
If you click on Change, it will bring back up the Insert image screen that you used in initially choosing your picture -
Finally, there is another More options menu on the right side of the trash can icon at the top -
There is an option to add Hover text to the image -
When you select this, it adds another line for text -
The text you put here will pop-up when the user hovers over the picture -


