Posts

Showing posts with the label format

Google Mail - Formatting Options

Image
There are many options available to format your email message if you would like.  You can find the formatting toolbar by clicking on the A in the menu at the bottom of your message compose window There are the following options on the formatting toolbar that pops up: Undo & Redo - undo or redo your previous actions within the message Font - choose the font you prefer Font size - choose from a select few options the font size Bold, Italics & Underline - standard, though try to avoid underlining as that signifies a link Color - you can choose a highlight color (the background behind selected text) and/or the font color Alignment - standard alignments are options Lists - create either an ordered (numbered) or unordered (bullets) list At the end of the toolbar is a downward pointing arrow.  This has some additional options: Remove formatting - this is VERY useful if you pasted in formatted text from another source as it will strip out all the formatti...

Google Sheets - Formatting Number Entries

Image
(Part of my administrative assistant series on Google Sheets.) Number entries can be easily formatted within Google Sheets.  In fact, if you know how you want the entries formatted prior to entering the data, you can even pre-format the cells so that the formatting occurs as you enter data! Options on the Formatting Toolbar : The most common formatting options are found right on the Formatting Toolbar - Here you can easily change a number to currency or a percentage, establish the number of decimals desired, and access the formatting menu. Menus for Formatting : There are actually two locations you can see the menu options for formatting - under the Format Menu and selecting Number, in addition to the formatting toolbar when clicking the "123" icon - The menu has many of the most popular formats, but notice at the bottom there is even a choice for More Formats where you can explore additional currency and date/time formats, or even create a custom format.   ...

Google Sheets - Alternating Colors

Image
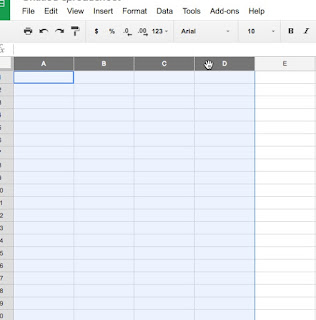
One popular request I often get from people that are looking at large sheets with lots of data is how to alternate the color of the rows to make it easier to read across and not lose your line.  Setting alternating colors is very easy with Google Sheets.  Simply - 1. Highlight the columns you want to assign alternating colors to 2. Go to the Format Menu and select Alternating colors... (towards the bottom of the menu) 3. Set your formatting -  A. Choose if you have a header and/or footer on your sheet - it will use darker highlights on those cells  B. Select the Formatting styles that are preset OR click on the + to create a custom style  C. Make any modifications you would like to the colors (Note: if you selected a preset style, as soon as you make a color change it will create a custom style) 6. Click Done If you want to remove alternating colors, go back to the Format Menu and select Alternating colors... and at the bottom of the ...

Google Documents - Columns are Here!

Image
Finally!  You can create and use columns in a Google Document...without the hack of inserting a table!! Columns is now an option in the Format menu (between "Line spacing" and "Lists").  You can select between 1, 2 and 3 columns - Selecting More options... brings up the following pop-up -  Again, in the pop-up, you can select between 1, 2 and 3 columns -  You can also change the spacing between columns, and select to have a line in that space -  It is important to note that the line will not appear between the columns unless you actually use both columns -  This also means there is an additional option in the Insert menu of a Column break -   And, you can apply columns to a section of the document if wanted - 

Google Sites - The Proper Way to Change Fonts & Colors

Image
Whenever you are working with a website, there is definitely a better way to make formatting changes that involve fonts & colors.  And this way does NOT involve using the little icons on the formatting toolbar - which is the obvious way since it is there visible when you are editing your pages! The proper way is to make those changes so they will set them for the entire site.  With Google Sites, it means making them in the Manage Site area.  When in the Manage Site screen, in the menu on the left is the option Themes, Colors and Fonts - this is what you want to select. Once there, you will see the following: Here's what all these areas are: Theme - you can see which theme you currently have selected, and change to another theme Page Areas - you can select which area of the page you would like to modify Page Parts - this list the various parts/options that can be changed Format - this shows the formatting that you can modify Preview - a preview windo...

Google Sites - Adding & Modifying Text

Image
Once you have created your page in Google Sites, you probably want to add content! The most basic of content types is text.  To add text, you can: type it manually copy & paste it from another source Make sure you have enabled Edit Mode on the page prior to trying to add text.  You will know you are in edit mode as there will be greyed dotted boxes around the content area(s) and the formatting toolbar will be visible.   The formatting toolbar allows you to do the following: Undo/Redo Change font type, font size, font color & font background Use bold, italics & underline Add hyperlinks Use ordered & unordered lists Indent text to the right or left Justify text to the left, right or center At the end are a couple of additional icons.  The first (shown to the left here) will attempt to strip code out of text that has been copied from another program and pasted onto the page.   The second is the one to toggle into HTML cod...

Google Documents - Creating Custom Heading Styles

Image
One of the biggest reasons I am given that people do not use headings in their Google Documents is they want to customize the look of them.  However, creating your own custom heading styles in a Goggle Document is pretty easy - once you know how.  It just takes one step beyond what people already do in formatting their first heading, yet can save a ton of time if there are multiple headings throughout the document. Create Custom Headings: 1. Highlight the first heading and format to as you wish it to look (you can set font, font size, style, spacing, etc).  Here in my example, I have changed the font, enlarged it to 18 pt, bolded and centered it. 2. Go to the formatting toolbar, select the dropdown that says "Normal text," scroll down to "Heading 1" and select "Update 'Heading 1' to match" (or another heading of your choosing) 3.  Whenever you want to apply the same heading style, you can just highlight the text, go to the formattin...