Google Sites - Create a New Site
As a Google Apps for Education school district, one very flexible tool that you have access to is Google Sites. It is a website creator, but also give you the ability to do the following:
Here are the steps for creating a Google Site:
1. Go to sites.google.com If you haven't yet, log into your Google account.
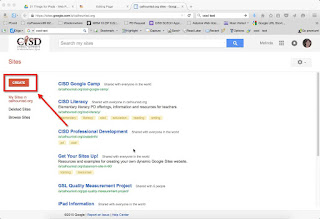
2. Click on the Create button
3. Enter the settings for your site.
4. Click the Create button (this is the second time you are doing that)
5. Google will create your site and the home page for the site
That's it! Your site is ready for you to add content to.
If you would like a video to watch, here it is on YouTube:
- Have pages accessible by parents (public viewing), and other pages on the site only view-able to your students (private viewing)
- Integrate seamlessly with the host of Google tools - including forms that can be filled out on the spot (without going to another page), embedded maps, and shared calendars to name a few
- Easily share files/documents with site visitors
- Fully integrate a blog/announcement page
Here are the steps for creating a Google Site:
1. Go to sites.google.com If you haven't yet, log into your Google account.
2. Click on the Create button
3. Enter the settings for your site.
- Blank Template: I encourage people to use a Blank Template when starting out with Sites as the templates from the Gallery may use certain page types that you are unfamiliar with and create confusion and frustration.
- Site Name
- Site URL
- Theme: Pick a theme. You can change just about any color/text that is part of a theme, so I suggest picking by layout that you like, not colors
4. Click the Create button (this is the second time you are doing that)
5. Google will create your site and the home page for the site
That's it! Your site is ready for you to add content to.
If you would like a video to watch, here it is on YouTube:


