Google Forms - Creating & Naming
(Part of my administrative assistant series on Google Forms.)
In my opinion, forms are one of the biggest pros to using G Suite for Education. They can be used to eliminate: email chains to gather opinions and/or ideas, paper ballots that are counted by hand, a series of phone calls to get the same information from multiple people. Those are just a few of the ways you can use them.
They are also one of the easiest to pick up and begin using. We will start this new series with how to create a Form.
When you create a form, you are automatically in "edit" mode. This is NOT the place you will be having people complete your form so do not share the URL at the top. It will not work like you expect it to :-)
Once your form is created, you will see the following screen. Purple is the default color theme -
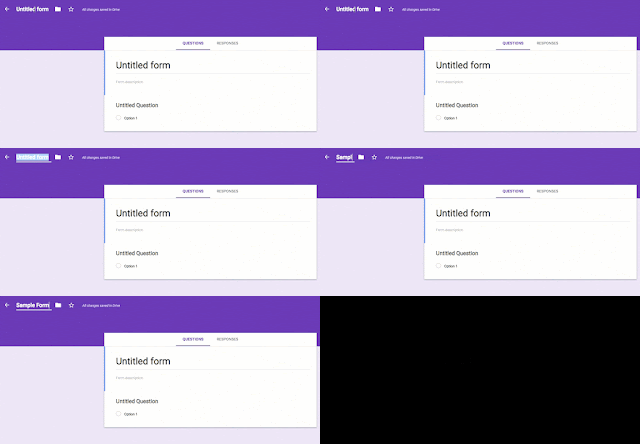
If you type the title in the upper left corner it will actually copy the title into the other area automatically-
That's all there is to creating and naming your form! Of course, it's not very usable until we add some questions - which we will be exploring next.
In my opinion, forms are one of the biggest pros to using G Suite for Education. They can be used to eliminate: email chains to gather opinions and/or ideas, paper ballots that are counted by hand, a series of phone calls to get the same information from multiple people. Those are just a few of the ways you can use them.
They are also one of the easiest to pick up and begin using. We will start this new series with how to create a Form.
Creating a Form
To create a new form, click on the blue New button, mouse down to More, mouse over to Google Form and click:
When you create a form, you are automatically in "edit" mode. This is NOT the place you will be having people complete your form so do not share the URL at the top. It will not work like you expect it to :-)
Once your form is created, you will see the following screen. Purple is the default color theme -
Naming Your Form
There are two places you can type in the Title of your form - in the upper -left corner, or where it says "Untitled form" in the content area, right about the middle of the window -
If you type the title in the upper left corner it will actually copy the title into the other area automatically-
Right below the "Untitled form" is an area where you can any additional information you would like those taking your form to have - it can include some specific directions, due dates, links to other places...whatever other information you want them to have. Or it could be left blank.
That's all there is to creating and naming your form! Of course, it's not very usable until we add some questions - which we will be exploring next.


